Set Up Login & Signup for Your App
If your app is meant to serve real users, whether they're customers, team members, students, or subscribers, they’ll need a way to sign up and log in securely.
Setting it up in Apper is easy and flexible. You can choose:
- How users sign up (email, phone, Google, Facebook)
- What rules apply (Password strength, email/phone verification)
- How everything looks and feels (Branding, preview, colors)
Let’s walk through the setup from start to finish.
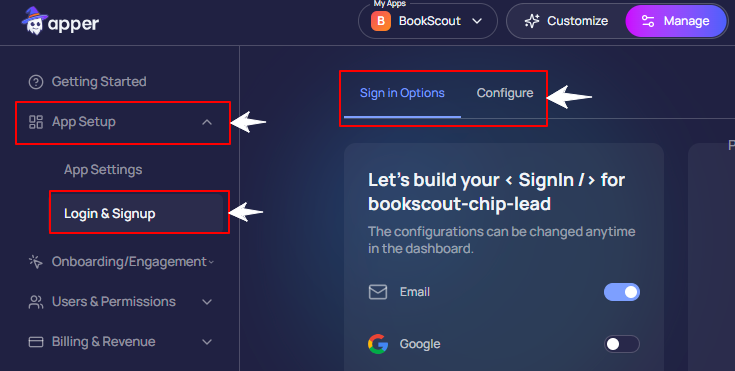
Step 1: Go to Login & Signup Settings
On the left sidebar, under 'App Settings', click 'Login & Signup'.
This section is divided into two parts:
- Sign In Options → Choose which login methods you want to support
- Configure → Control how login works behind the scenes (verification, passwords, etc.)
Step 2: Choose How Users Will Sign In
In the 'Sign In Options' tab, you can toggle on any of the following:
- Email login: Traditional email and password login
- Google login: 1-click login with a Google account
- Facebook login: Use Facebook to sign in
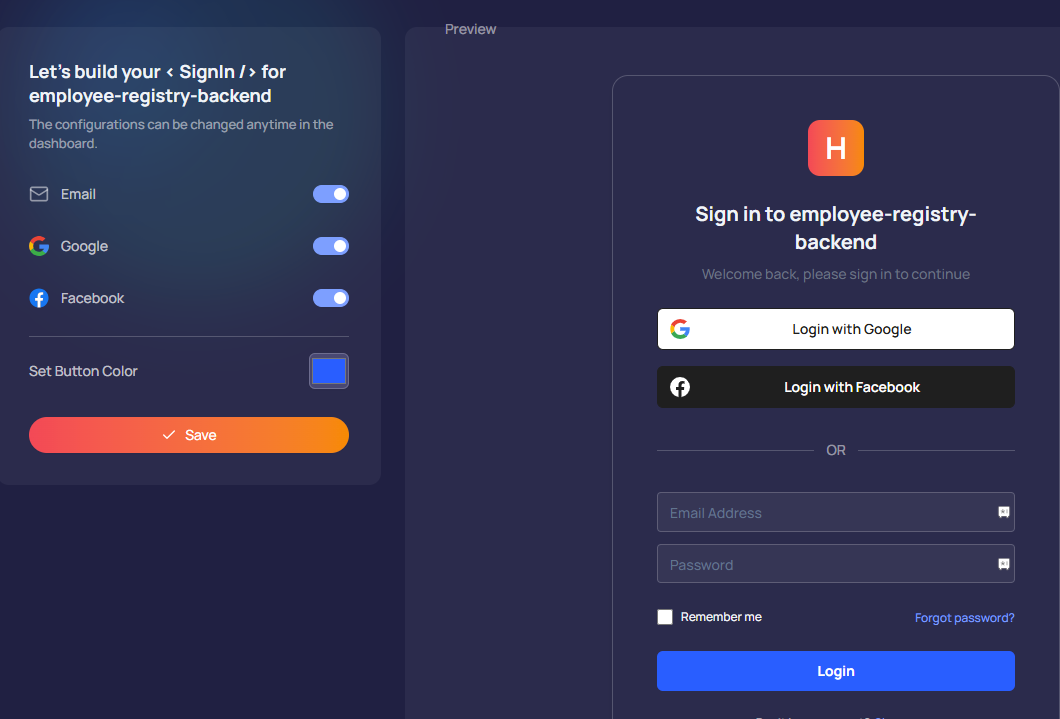
You can also change the button colors to match your brand.
All changes are visible instantly in the live preview on the right. So you know exactly what your users will see on the signup and login page of your app.
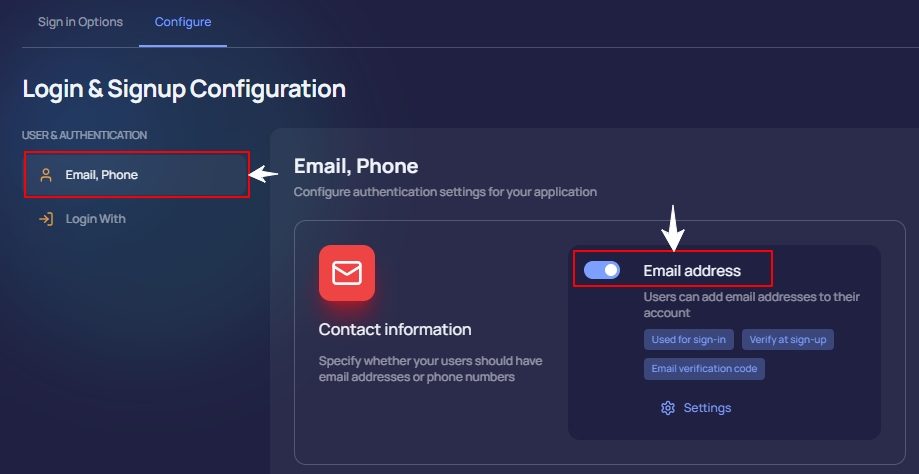
Step 3: Configure Login Behavior
In the ‘Configure’ tab, you control how the login system actually works. It has two sub-sections:
➤ Email & Phone
If you've enabled Email login as a sign-in method, choose whether users log in using email, phone number, or both.
This allows flexibility depending on your app’s audience.
You can also enable email or OTP verification to validate users on sign-up:
-
Under ‘Configure’ tab, locate the Email/Phone toggle and switch it on
-
Click Settings underneath
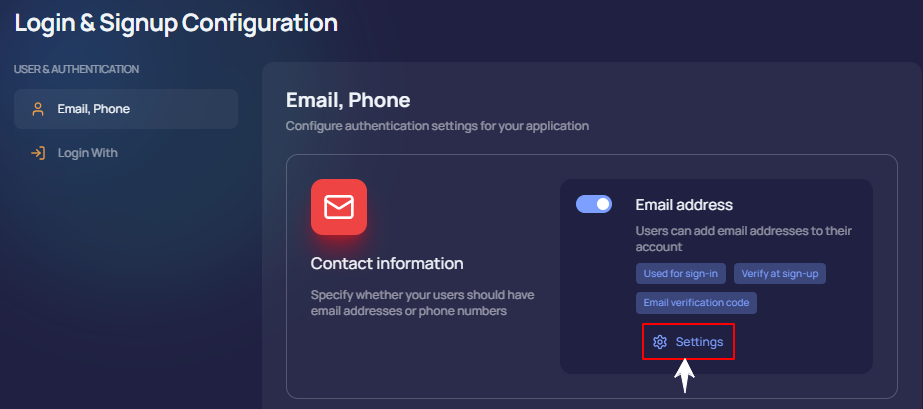
- Toggle on “Verify at sign-up”
- Choose the verification method: Email verification link or OTP code
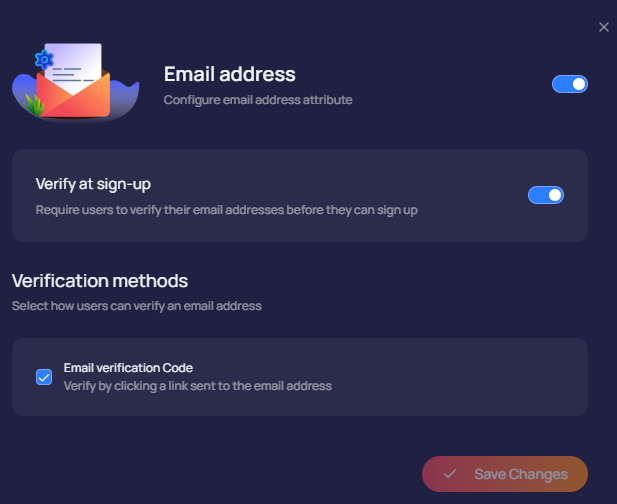
- Click Save Changes
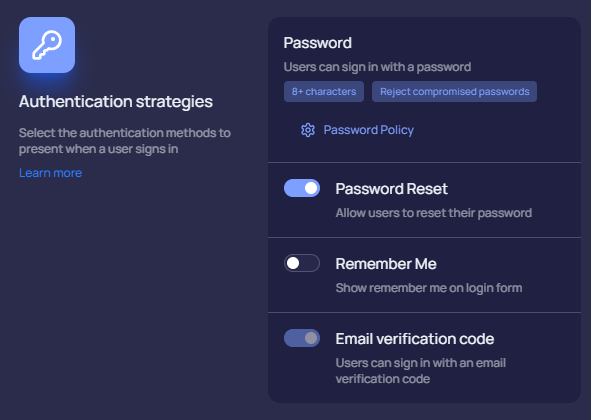
➤ Set Password Rules for Email Login
- Password Reset: Let users reset forgotten passwords
- Remember Me: Show a checkbox on the login screen to stay signed in
- Email verification code: Let users log in using a one-time code instead of a password.
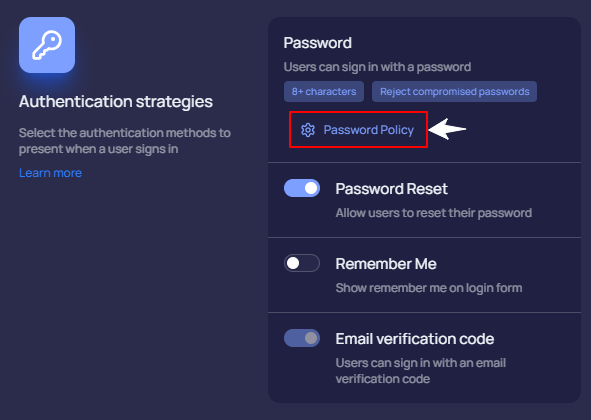
In the ‘Authentication Strategies’ section, scroll down and click ‘Password Policy’ settings to set advanced password rules.
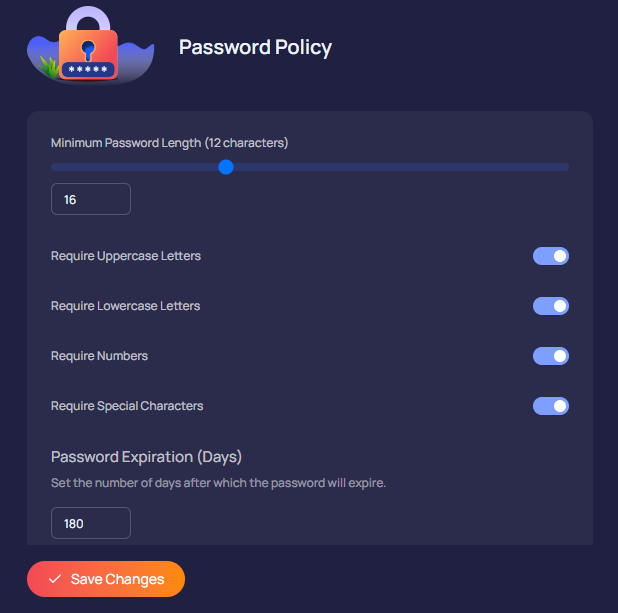
Here’s what you can configure:
-
Minimum password length (e.g., 8+ characters): Shift the slider to increase the length.
-
Characters required in your password:
✅ Uppercase letters
✅ Lowercase letters
✅ Numbers
✅ Special characters
-
Password expiration: Set how many days a password stays valid before it must be changed.
-
Once you're done, click Save Changes to apply your password policy.
Step 4: Configure Google and Facebook Login
If you've enabled Google or Facebook login, the next step is to configure how it works.
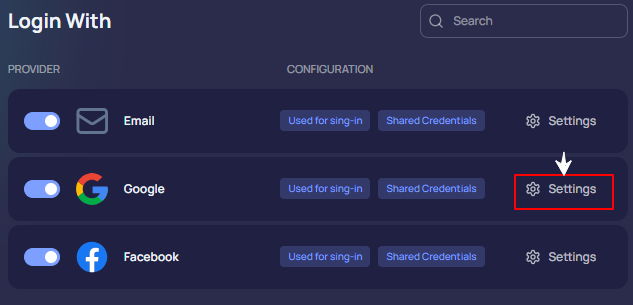
Go to the 'Configure' tab → open 'Login With' settings.
To let users sign in with their Google or Facebook account, you need to connect your app to those platforms.
Here, you’ll see toggles and settings for:
- Email login
- Google login
- Facebook login

Each option has its own Settings button where you can configure how it works.
We’ve already covered Email login settings earlier, so let’s now look at what you can do with Google login.
➤ Google Login Configuration
Click the 'Settings' button next to Google to open its configuration settings.
To let users sign in with their Google or Facebook account, you need to connect your app to these social platforms.
Apper gives you 2 ways to do so:
Option 1: Use the Default Connection Setup (Simple and automatic)
When you turn the 'Use Default Credentials' toggle on, Apper uses a secure connection it has already set up with Google and Facebook.
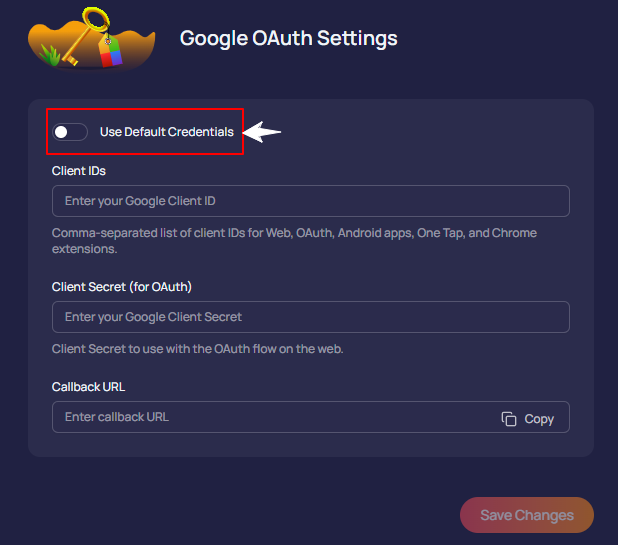
Due to this connection, users can log in with just a click, but the login screen will show Apper’s name instead of yours. That’s because you’re using Apper’s shared connection, not your own.
This is ideal for testing, prototyping, or if you don’t need custom branding yet.
Option 2: Use Your Own Connection Setup (For custom branding and control)
You might want the login pop-up to show your app’s name and logo, especially if you're preparing to launch your app publicly.
In that case, you can connect your own setup with Google & Facebook (instead of using Apper’s default shared connection).
It’s a one-time setup and takes just a few minutes.
Once it’s done, just copy and paste the Client ID, Client Secret, and Callback URL from your setup into Apper.
Not sure which setup option to choose?
Start with the default as it works instantly. You can always switch to your own setup anytime.